How to create a contact form in Next JS and Firebase?
Hello friends, Today in this post we will see how to create a contact form in NEXT JS and Firebase. By doing this contact form you will learn about Form handling, integrating NEXT JS application with firebase, adding data into firestore, etc. So Let's Started
Step 1: Firebase Setup
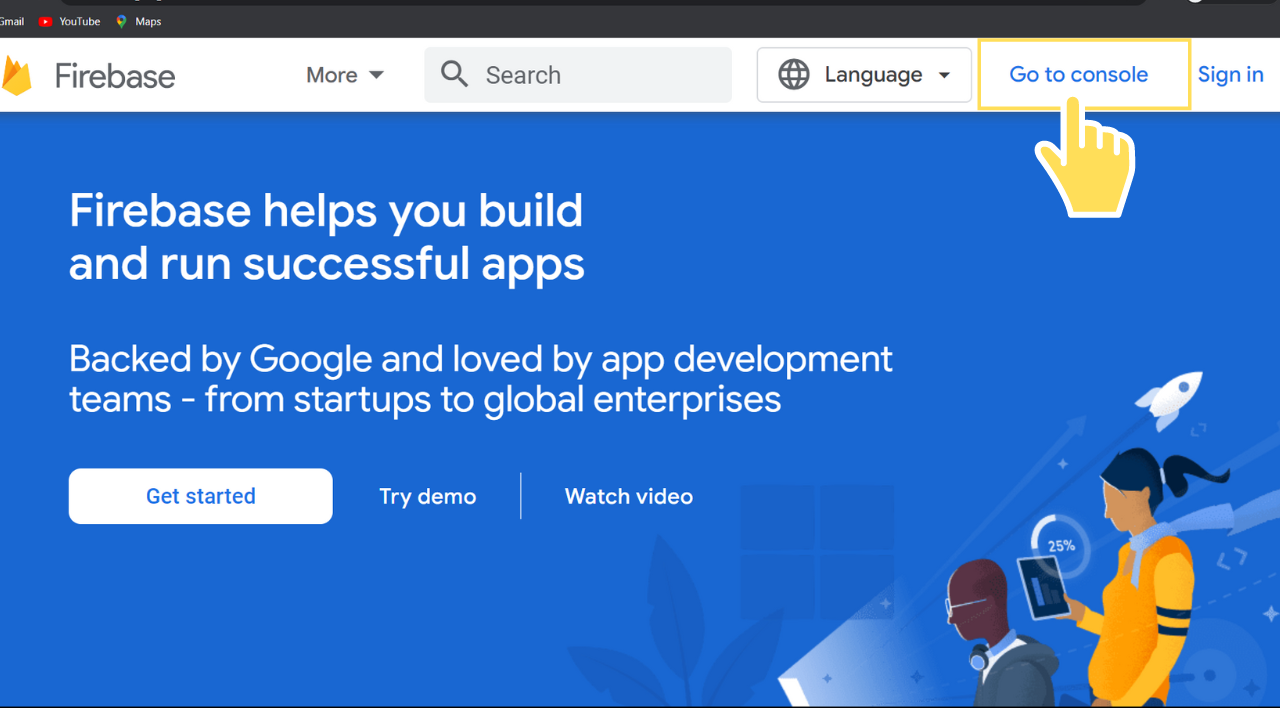
Open Firebase,https://firebase.google.com/ click on Go to Console & Sign In
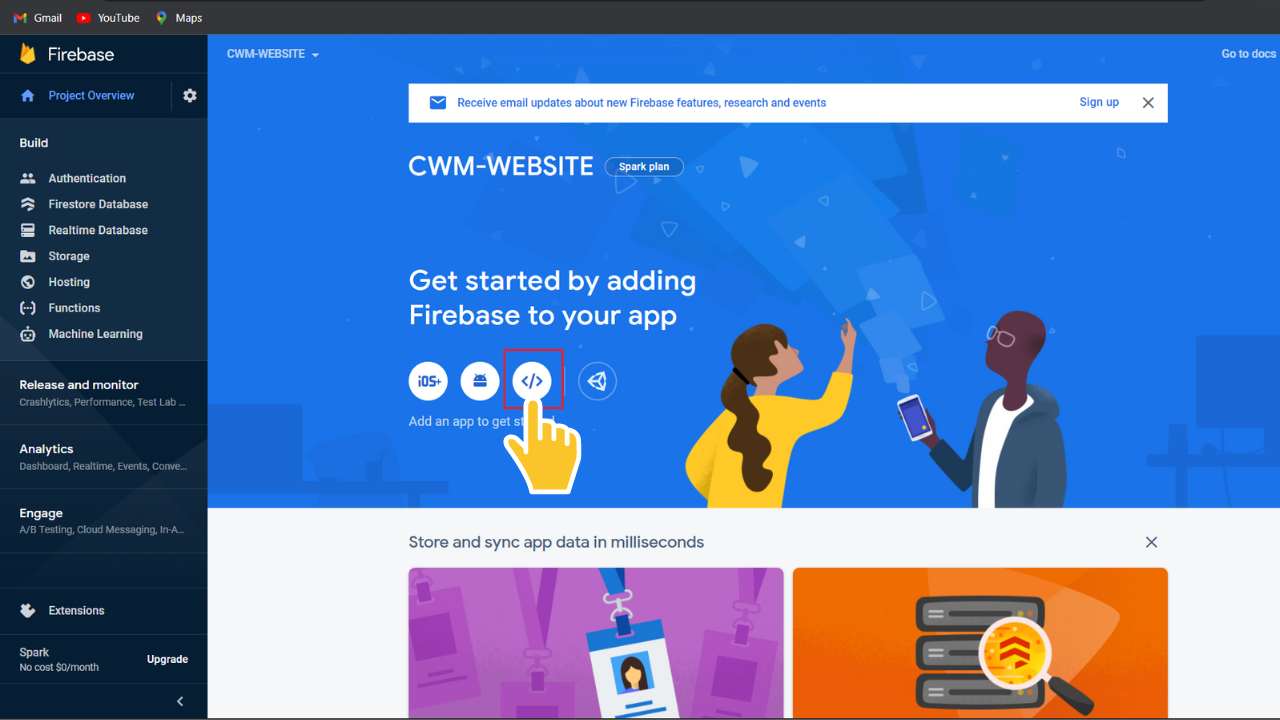
Create a new project with the project name and rest with default settings.
Once created, Under Project Overview, Click the tag-like symbol to add a web app.
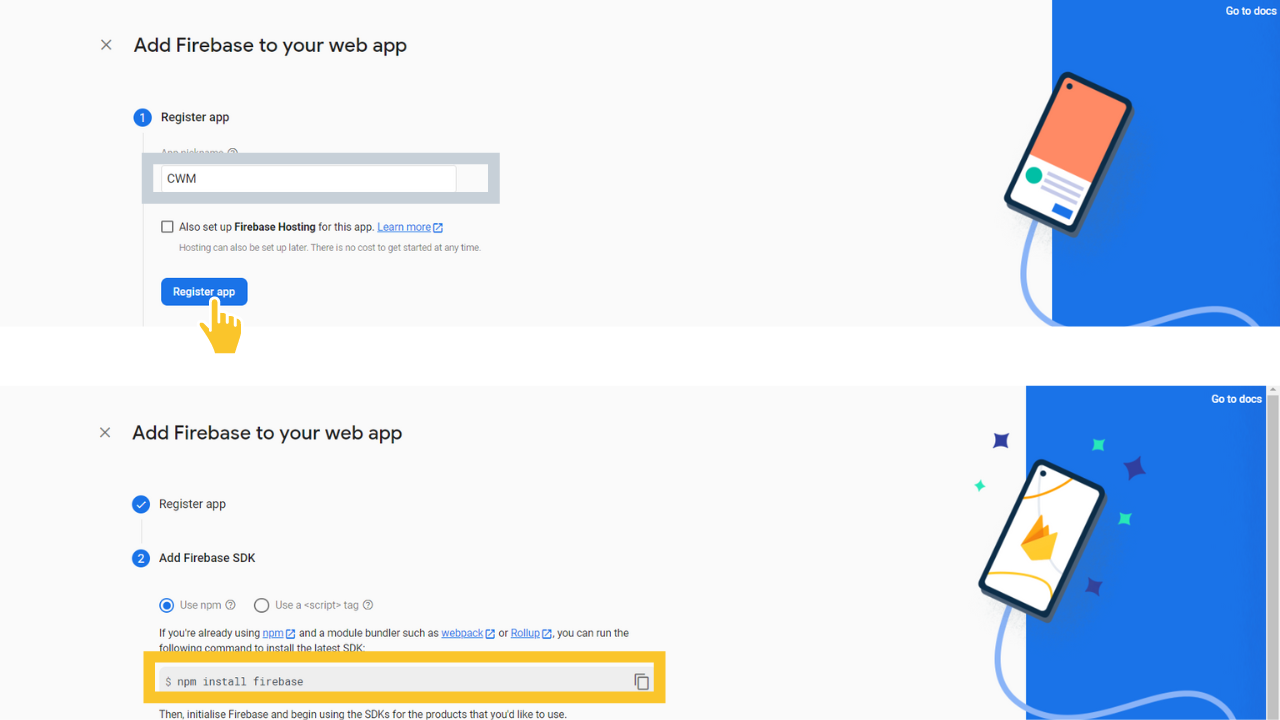
Now specify App Nickname and click on Register app, in next step we need to copy the code generated below that npm install command
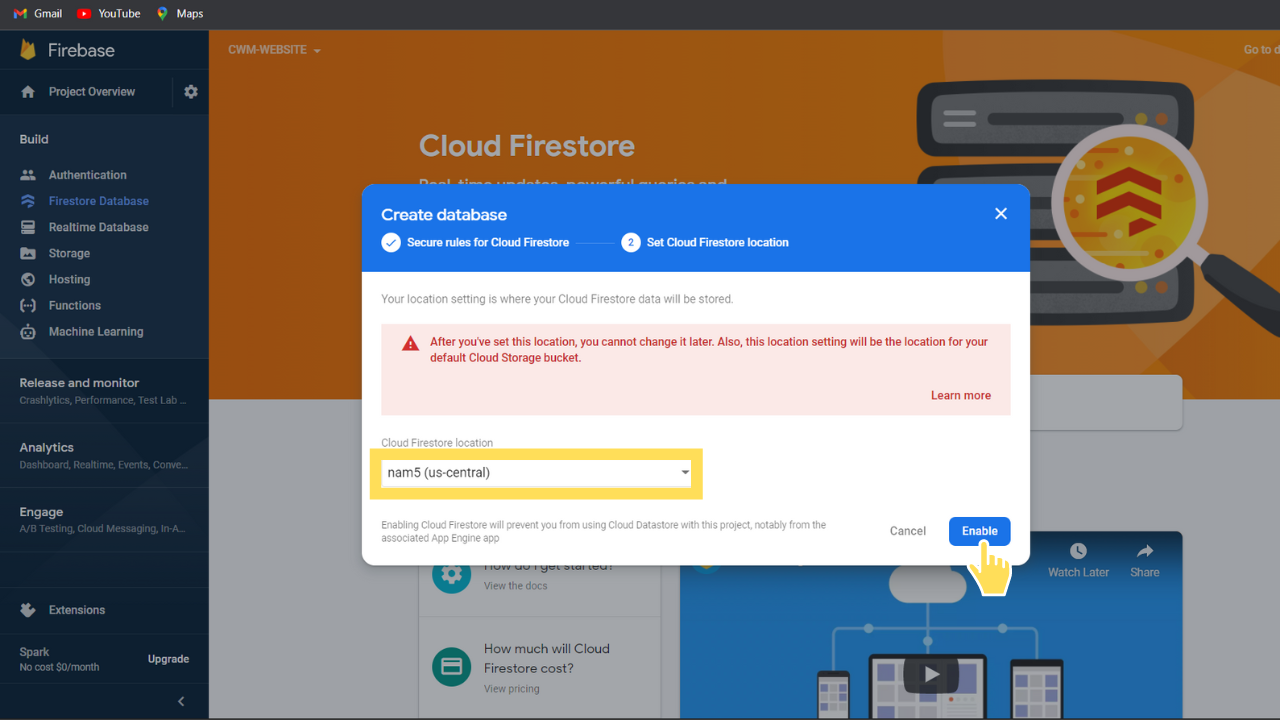
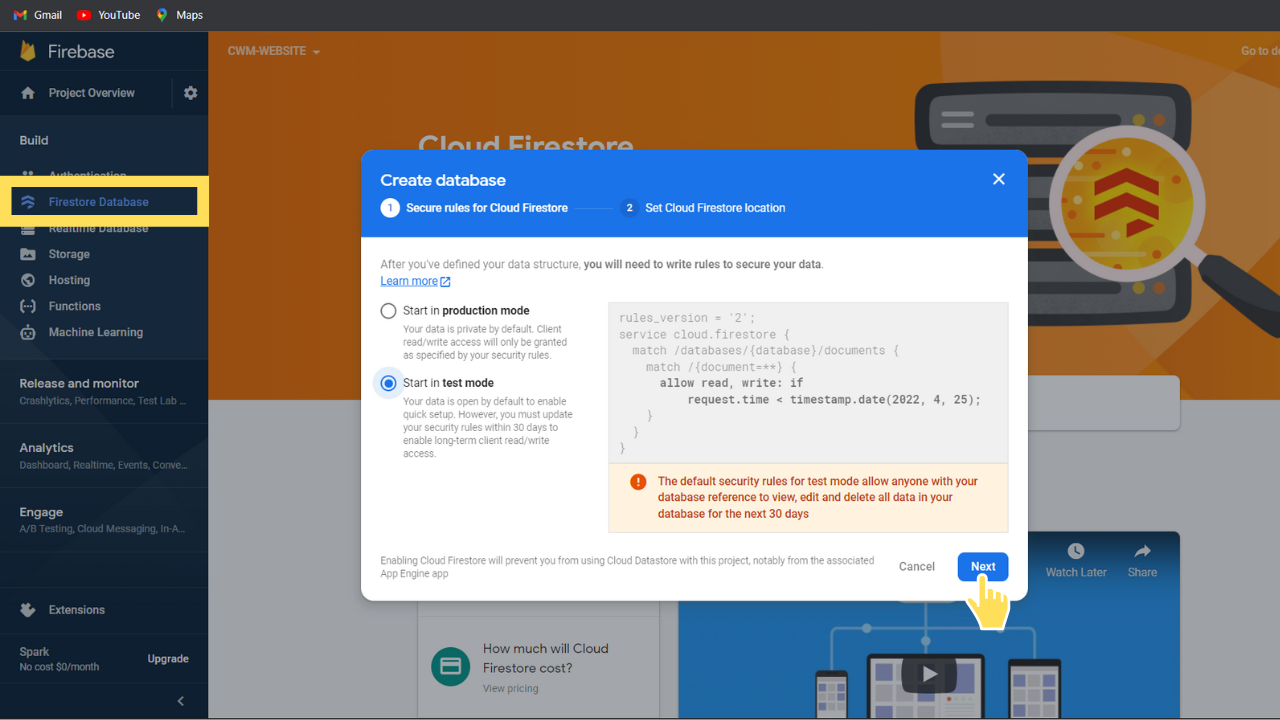
Click continue to console at the bottom, now click on Firestore and Get Stated. Select region & then start with test mode and click Enable.
That's it with the firebase setup.
Step 2: Project Setup
Install the firebase package
npm install firebase
Create one file named firebaseConfig.js in your root, paste the code here which we copied while setting up with firebase
Additionally, to use firestore we will import getFirestore from firebase / firestore / lite. Create a firestore variable which is equal to getFirestore(app)
// Import the functions you need from the SDKs you need
import { initializeApp } from "firebase/app";
import { getFirestore } from "firebase/firestore/lite";
// TODO: Add SDKs for Firebase products that you want to use
// https://firebase.google.com/docs/web/setup#available-libraries

// Your web app's Firebase configuration
// For Firebase JS SDK v7.20.0 and later, measurementId is optional
const firebaseConfig = {
  apiKey: 'YOUR_API_KEY',
  authDomain: "YOUR_AUTH_DOMAIN",
  projectId: "YOUR_PROJECT_ID",
  storageBucket: "YOUR_STORAGE_BUCKET",
  messagingSenderId: "YOUR_MESSAGE_SENDERID",
  appId: "YOUR_APP_ID",
  measurementId: "YOUR_MEASUREMENT_ID",
};

// Initialize Firebase
export const app = initializeApp(firebaseConfig);

export const firestore = getFirestore(app);
Step 3: Contact Form
Create a new folder services in root and create a file named index.js. First import addDoc, collection & Timestamp from firebase / firestore / lite. Now add a async function sendContactForm with name, email and comment as parameter. Inside that function create a collection ref and call addDoc function with await and pass the collection ref and data to be inserted, for data add a sentAt field for sending current timestamp. We will wrap everything under try catch and return 0 at the end of catch block and return -1 inside the catch block in case of failure.
/services/index.js
import { addDoc, collection, Timestamp } from "firebase/firestore/lite";
import { firestore } from "firebaseConfig";

export const sendContactForm = async ({ name, email, comment }) => {
  try {
    const ref = collection(firestore, "contact");
    await addDoc(ref, {
      name,
      email,
      comment,
      sentAt: Timestamp.now().toDate(),
    });
    return 0;
  } catch (err) {
    console.log(err)
    return -1;
  }
};
Now create a form with following input fields name, email and comment, and at last add a submit button. Now for the onSubmit function we will call this sendContactForm function.
Additionally we will create a reference variable for the form which we will use to reset the form onsubmit success and a state variable message to store success / failure message to display.
import React, { useState, useRef } from "react";
import { sendContactForm } from "services";
const Contact = () => {
const [message, setMessage] = useState("");
const formRef = useRef();
const submitContact = async (e) => {
e.preventDefault();
console.log(e);
const res = await sendContactForm({
name: e.target[0].value,
email: e.target[1].value,
comment: e.target[2].value,
});
if (res == 0) {
setMessage("Thank you for your valuable comment!");
formRef.current.reset();
} else {
setMessage("Something went wrong! Please try again");
}
};
return (
<div className="container max-w-2xl text-center">
<h1>
{"Contact Us"}
</h1>
<div>
<div>
{message}
<span
onClick={() => setMessage("")}
>
×
</span>
</div>
<form
ref={formRef}
onSubmit={submitContact}
>
<input
required
placeholder="Name*"
type={"text"}
minLength={3}
maxLength={25}
/>
<input
required
placeholder="Email Address*"
type={"email"}
/>
<textarea
required
placeholder="Comment*"
rows={5}
></textarea>
<button type="submit">
Send
</button>
</form>
</div>
</div>
);
};
export default Contact;
If you are not sure what useRef means, it will basically create a DOM reference for the JSX element and allows us to execute DOM-related functions associated with it.
So now you can test it by running the project locally using the below command
npm run dev
Fill in the data and submit the form, if success then you will see the submitted data inside the firestore, if you are not seeing any data then check on the browser console for any errors try to solve it if you can't then please contact us / comment.
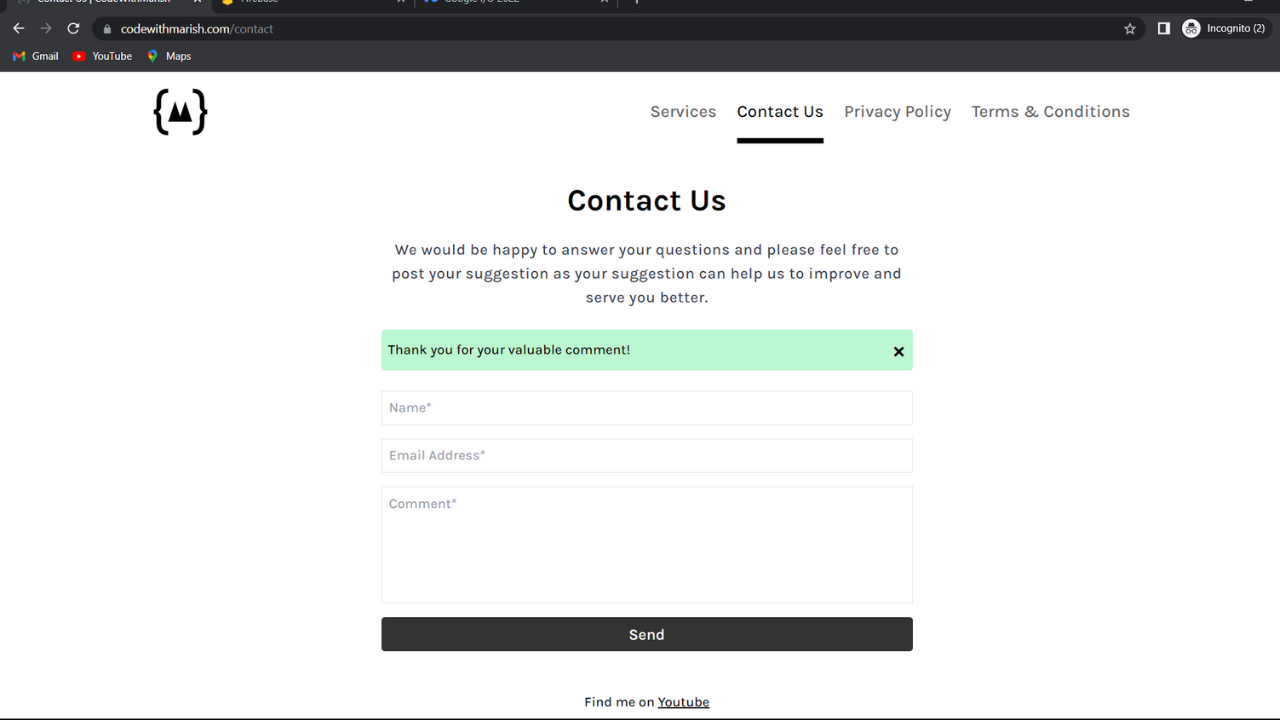
I applied the styles for it and final result looks like below.
If you are facing any issues please contact from our contact section.
https://codewithmarish.com/contact
Thanks for reading this post, if you found this post helpful please share maximum, Thanks for reading 😊 Stay tuned.
Also please don’t forget to subscribe to our youtube channel codewithmarish for all web development related challenges.
